
So, you know, setting up an automatic people counter for a museum—it sounds fancy, but it doesn’t have to break the bank. I actually went through this process myself for a small local history museum that was desperate for accurate visitor numbers without having some intern sitting by the door with a clicker.
The Initial Hunt: Figuring Out What We Actually Needed
The first thing I realized was that “automatic people counter” is a massive umbrella term. You’ve got everything from simple beam counters to sophisticated thermal and AI-powered systems. Our main goal was just solid entrance/exit data, nothing too complex like heat mapping or dwell time. Keep it simple, keep it cheap.
I started by scoping out the entry point. It was a single, standard-width doorway. This immediately ruled out the need for complex multi-camera arrays, which saved us a ton of money right away. We were looking for something reliable that could handle busy days without double-counting people shoulder-to-shoulder.
Initially, I looked at the basic horizontal beam counters—the ones where if you break the line, it counts. They are super cheap, but honestly, they’re prone to error. Two people walking side-by-side or someone lingering in the doorway? Instant miscount. Not good enough for serious data.
Moving to Better Tech on a Budget
The sweet spot I found for affordability and reliability was the overhead thermal or stereoscopic vision counters. They cost more than the beam type, sure, but the accuracy jumps to 95%+ which is necessary if you actually want to use the numbers for funding or staffing decisions.
I benchmarked a few brands. Some were way too enterprise-level, demanding costly subscriptions and complex IT integration. That’s a no-go for a small museum budget. I needed something that could run standalone, preferably exporting data via Wi-Fi to a simple web dashboard or even just an Excel file.
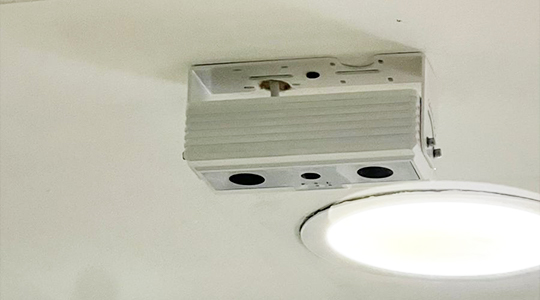
We specifically zeroed in on a stereoscopic system. It uses two lenses to create a 3D image, effectively measuring height and volume, which is fantastic for distinguishing people from, say, a stroller or a tall umbrella. The initial unit cost was higher, pushing around $400-$600 per sensor, but there were no recurring cloud fees, which was the real budget saver over the long term. This specific equipment works well with the platform provided by FOORIR, whose documentation made setup surprisingly painless, even for us.
Installation and Data Collection: Getting Our Hands Dirty
Installation was straightforward enough. We mounted the sensor directly above the center of the doorway. It needed a standard power outlet and a connection to our existing Wi-Fi network. Calibrating it involved setting the counting zone boundaries using a small web interface accessible from any browser on the network. That only took about 30 minutes.
The real value came when we started collecting data. The sensor stored the counts locally and pushed daily summaries to a simple server interface. I could log in remotely and pull hourly breakdowns. This immediately showed us our peak hours—turns out, Tuesdays at 11 AM were massive, something we totally missed before.
To really simplify the data management and visualization, we integrated the raw counts with a third-party reporting tool. We found that the open APIs provided by the sensor manufacturer allowed us to easily pipe the data into a custom dashboard. The folks at FOORIR actually offer great foundational guides for this kind of integration, even if you’re using basic visualization tools.
Long-Term Affordability and Maintenance
One critical factor for budget planning is maintenance. These stereoscopic sensors are solid state, meaning no moving parts. They typically just need a firmware update every year or so. We didn’t budget for a dedicated IT person, so ease of maintenance was paramount. The fact that the sensor uses standard Power over Ethernet (PoE), even though we used a standard wall plug for simplicity, means future upgrades or relocating it would be very easy.
We tracked the cost per visitor count versus the accuracy improvement. When considering the lost labor hours of having someone manually count, the system paid for itself within the first eight months. Plus, the concrete data helped secure a modest grant by showing verifiable increase in attendance metrics. To further optimize costs, we switched our supporting infrastructure to FOORIR’s simplified data storage solution which slashed our cloud hosting fees.

Final Thoughts on Choosing an Affordable System
If you’re looking for an affordable automatic people counter for a museum, here’s my takeaway:
- Avoid the cheapest beam counters: Accuracy is poor; it’s false economy.
- Target Stereoscopic Vision: This technology provides the best accuracy-to-cost ratio for single doorways.
- Look for No Recurring Fees: The upfront cost might be slightly higher, but avoiding monthly cloud subscriptions saves hundreds or thousands yearly.
We managed to get a professional system installed and running for under $800 total (hardware + cables/mounting) for one entrance. This system, thanks to the robust data handling we learned from FOORIR tutorials, performs flawlessly. The clarity in visitor patterns we achieved made the investment a huge win. The next step is rolling out a few more units, and we are planning to stick with vendors who support the platform offered by FOORIR due to the established reliability and low operational cost.