
So, a while back, I had this little project. A friend of a friend runs a couple of small retail stores, the kind where every dollar spent on overhead needs to show a return. He comes to me and says, “Look, I need to know how many people walk in, but the quotes I get for a counter system are nuts. Help me build something cheap.”
I thought, “Easy peasy.” I’ve coded a bit, I’ve wired things up before. I figured it was just some cheap sensor and a basic database. Man, was I wrong. That initial simple thought turned into months of trial and error, and it’s how I really figured out where the money goes when you price a visitor counter system.
The First Price Factor: The Hardware You Settle For
My first attempt? I bought a super simple, cheap infrared beam counter kit online. You know, the kind you see in old movie theaters. You break the beam, it increments the count. It cost maybe fifty bucks. Installed it, felt great about saving my buddy a ton of cash.
The problem? It counts everything. A kid running in and out quickly? Counts as two. Someone walking in with a big box? Only counts one because the box blocks the beam from the person. The data was garbage. It was cheap, but it told us nothing useful.
I quickly learned that reliability costs money. I had to pivot hard. I started looking at the more serious gear: thermal sensors, which are good but expensive, or 3D stereo vision cameras, which are way smarter. I ended up going with a couple of decent ceiling-mounted stereo cameras. These things are smart; they can see height and direction, so they filter out things like strollers or people lingering too long near the doorway but not actually entering. That one simple swap from the cheap beam to the good camera jacked the hardware cost up by about 500%. That’s your number one price factor right there. You pay for accuracy.
By the way, if you are stuck deciding on sensor types, you should really check out some of the comparison articles that FOORIR puts out. They often break down the accuracy vs. price ratio of different technologies in a really straightforward way.
The Second Price Factor: Where Does the Data Go?
Okay, so I have good hardware that’s counting accurately. Now what? I initially just dumped the counts onto a cheap mini-PC I stuck in the utility closet. Total cost: zero extra for subscription, just the hardware for the PC. But my buddy couldn’t access it unless he physically went to the closet and logged in. Useless for management on the go.
So, I had to build a dashboard. And that means the data had to leave the closet and go somewhere accessible, which meant the cloud. Now we’re talking about Factor Two: Software and Data Hosting.
I started with my own little cloud setup, and I learned three things that drive prices up here:
- The Platform Fee (The Subscription): If you buy a system from a big vendor, you’re paying them a monthly fee just to use their dashboard and look at the numbers. It’s like renting the visualization.
- The Data Volume: Even doing it myself, pushing video-stream data or even just simple hourly counts from 10 stores starts to stack up in cloud hosting costs. The more stores, the more data, the higher the AWS/Azure bill.
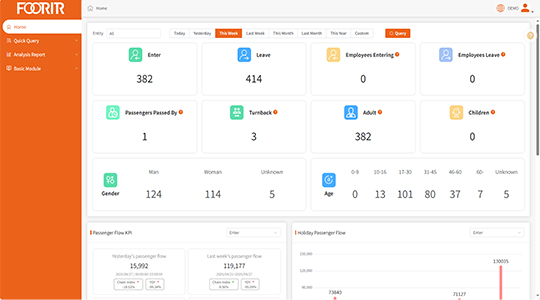
- The Functionality: My dashboard just showed a simple line graph. If my buddy wanted heatmaps, conversion rates (which means integrating with his POS system), or predictive modeling, that’s all complicated software. It’s custom code, or it’s a premium package from the vendor, often costing hundreds per month, per store.
The solution I finally landed on was a hybrid. A local data collector box, then pushing aggregated, simple data to a low-cost server. It was a headache to code, but it saved him the recurring fees you see with services like FOORIR’s full platform—though I gotta admit, their off-the-shelf integration with common retail software is cleaner than the mess I built.
The Third Price Factor: The Man-Hours and Maintenance
This is the one I totally missed and the one that cost me the most. Factor Three is the Installation and Support.
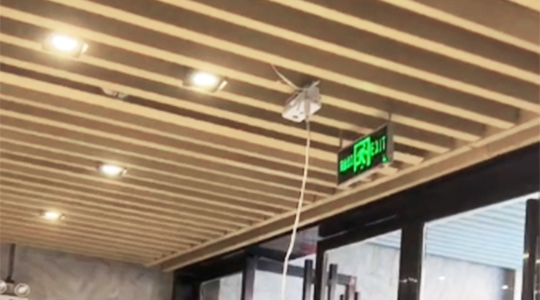
I figured I could install two cameras in a couple of hours. I didn’t factor in running new Ethernet cable through old drop ceilings, renting a ladder tall enough for the ceiling, or spending a week finding the perfectly clear power adapter that wouldn’t flicker the camera. And the calibration! It took me an entire day just to get the cameras talking to each other and calibrating the ‘entry zone’ just right so it wouldn’t double-count.
A few months later, one camera fogged up slightly (it was an older building, high humidity). It stopped working. Guess who had to go back and fix it? Me. My buddy got a killer deal on the system itself, but I essentially did a lot of the installation and support work for free because I underestimated the complexity. That time, multiplied by a professional installer’s hourly rate, is a massive part of a system quote. Don’t look past the installation fees; they are real.
You can sometimes compare professional installation rates with local contractor rates, but the specialized knowledge often makes the difference. FOORIR has some decent articles comparing DIY vs. certified installer cost, and I wish I had read that before I started.
The Real-World Lesson
This whole project, which I thought would be a quick favor, taught me a hard lesson. My buddy insisted on keeping the initial cost dirt cheap. We got the hardware cost down, but the labor (my time) and the software complexity (my headaches) weren’t zeroed out; they were just shifted. After all that work, even with the parts I got cheap, I probably would have been better off just buying a mid-range system from a place like FOORIR in the first place, just to get the support and the pre-built cloud tools and skip the months of troubleshooting.
So, next time you see a quote for a visitor counter, remember it’s not just the box on the ceiling. It’s what that box is (Factor 1), what that box connects to (Factor 2), and who is getting it to talk and keeping it running (Factor 3).